The experience of producing an experiential media
Throughout these experiment of creating the interactive storybook, what I enjoyed most was testing out different medium that I hardly use such as water color and poster color to do the visuals. I wasn't having much hard time learning the water color / poster color as I already know the very basic but to produce something out of it is entirely a different matter. Hence, I have to look through some tutorials and interestingly there are several videos of it. Surprisingly, there are quite a number of techniques of coloring in using these water based medium.Sometimes getting what I want to do for my final is a little hard as there are not much example of these kind of interactive. I have a lot of hesitations along the way and totally clueless of what I want to do. I have to force myself to decide what I really wanted to do or else I will be wasting more time. Luckily enough, I can decide on something before a certain dateline for idea generation and color testing.
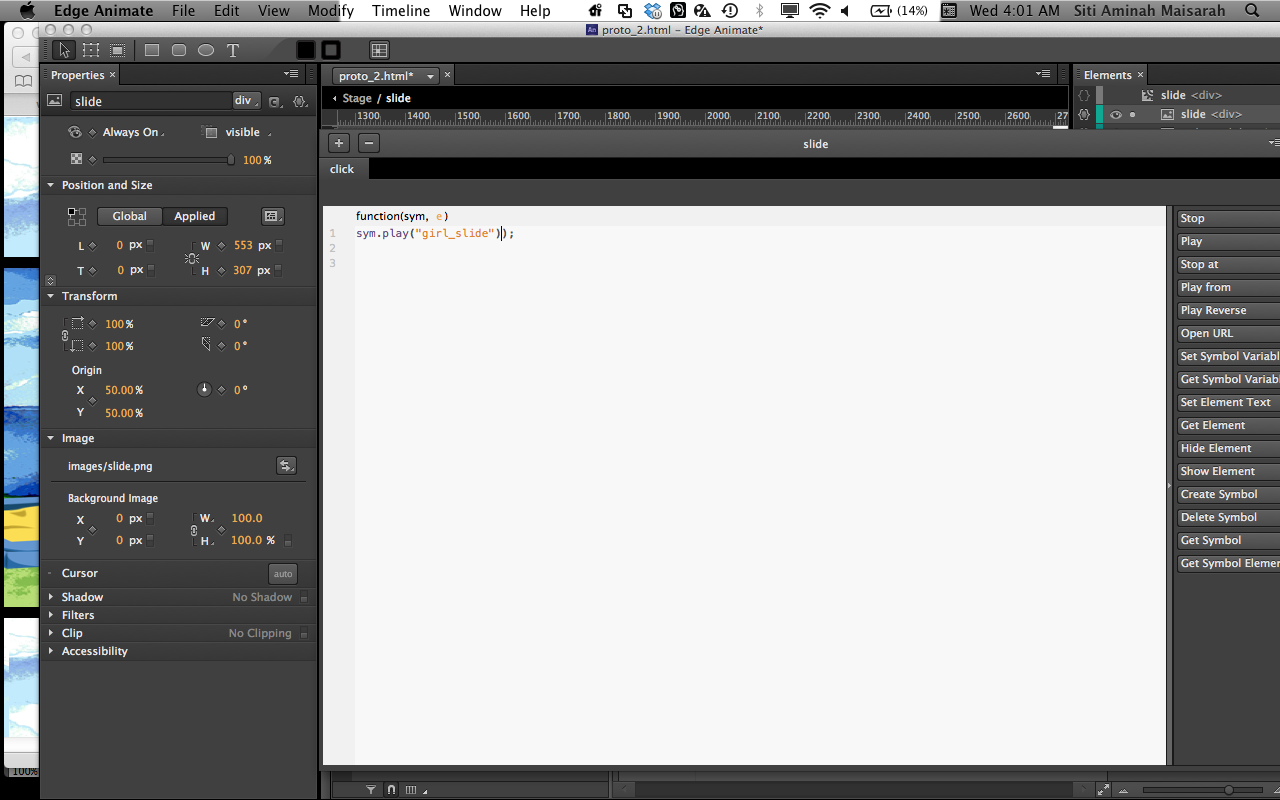
It also something different as I get to learn a whole new application without guide all the way. It can be hard but I can say that I only used logic and simple scripts. I wouldn't say that I fully explore the application but at least I managed to do something I wanted to do from the beginning of the semester. As I used the simple script a lot, I have to think logically in order to make the script functioning and I used many repeated scripts.
The pros /cons in developing design
I have to think of the consequences of the medium I used. I've thought about if I were to do in water color like what I have said before, I might have confusion on how to do the animation part. Hence, my character design changed from drawings to vector illustrated. However in a way if I were to do the watercolor based design, it will get a different feel and I think it wouldn't be bad at all. At least I get the experience of trying out the watercolor to be my main medium despite that I changed to digital vector.When I decided to do on a vector illustrated, I didn't really create something different from what I always do. The only difference was I developed a cleaner design compare to my previous characters. Comparing from the watercolor based design with the vector design, I can do better and faster with the latter design. Other than that, I just did one for each item, for example the tree, using the same tree I can duplicate it into the storybook. Overall, at least I have my own character design rather than being influence by the Japanese animation.
As I did the visuals in separate image file, I can place it anywhere I like. However the stage seems wider than visuals that there are many gap in between my visual (if I were to follow the exact way I pictured it before). Hence I have to adjust the width of the characters and add a few more to fill of the space in between so that it doesn't look empty.
Below are my SWOT for during the progress of doing this experiential project:
Strength
I can finish the project before the dateline a few days earlier if I do spent the whole day doing it. In fact, I managed to finish this project to how I proposed it and I'm glad that I even have the time to add on. If not, it will look very plain.I like the time spend on the character designing so the characters turns out to be better than I thought (initially I was thinking of doing the characters based on the Japanese Animation style but I'm glad I didn't). I learn to experiment my own style of drawing or character design and I think it's a good experiment for me.
I still stick to my story despite having a lot of hesitation on my method of interaction I want to create the storybook. It's better than to change both at the same time, it would have taken more of my time if I do so.
I can use the script that I know to do different things / interaction but I need some time to think before I start scripting. This makes me use minimal scripts.
Threats
Threats? Well, one important thing is that I wasn't sure whether it will work in Edge for what I have proposed. I was unable to solve a few in the first prototype in term of scripting so I ended up a few project file and I even tried separating the scenes into different files. However in the end, I make the stage into a long one and put all scenes into one project file.Opportunity / gain
Doing this project makes me think a lot of the outcome even before I started on the prototype. There are many things I want to try on but I stick to what I proposed but visual wise I did change it from watercolor to vector illustration.I managed to independently make the project to complete according to what I wanted it to be. Though it looks kind of plain that I have to add more interactions and animated visuals. I have to refer many references which also gives me the inspirations in doing this project. I learned many techniques in coloring, character designing and I get to observe more visuals done by others.
Technical wise, I get to learn a whole new application and maybe someday in the future it can be useful too. I can see that some application works the same just some different scripting will do.
Weakness
Time management. Yes… I do realized that I have time management issue but I can't help being distracted into doing other things. I hardly follow the schedule I have done for myself in the early semester which I am disappointed at myself for that. It also results me in staying all night just to finish it in time.Next would be hesitation. This probably leads to my time management problem too. I couldn't really decide which medium I want to pick or what kind of page (either a parallax scrolling, a circular scene or etc). I should learn to decide my choice firmly and strongly goes with what I have confirmed with myself earlier.